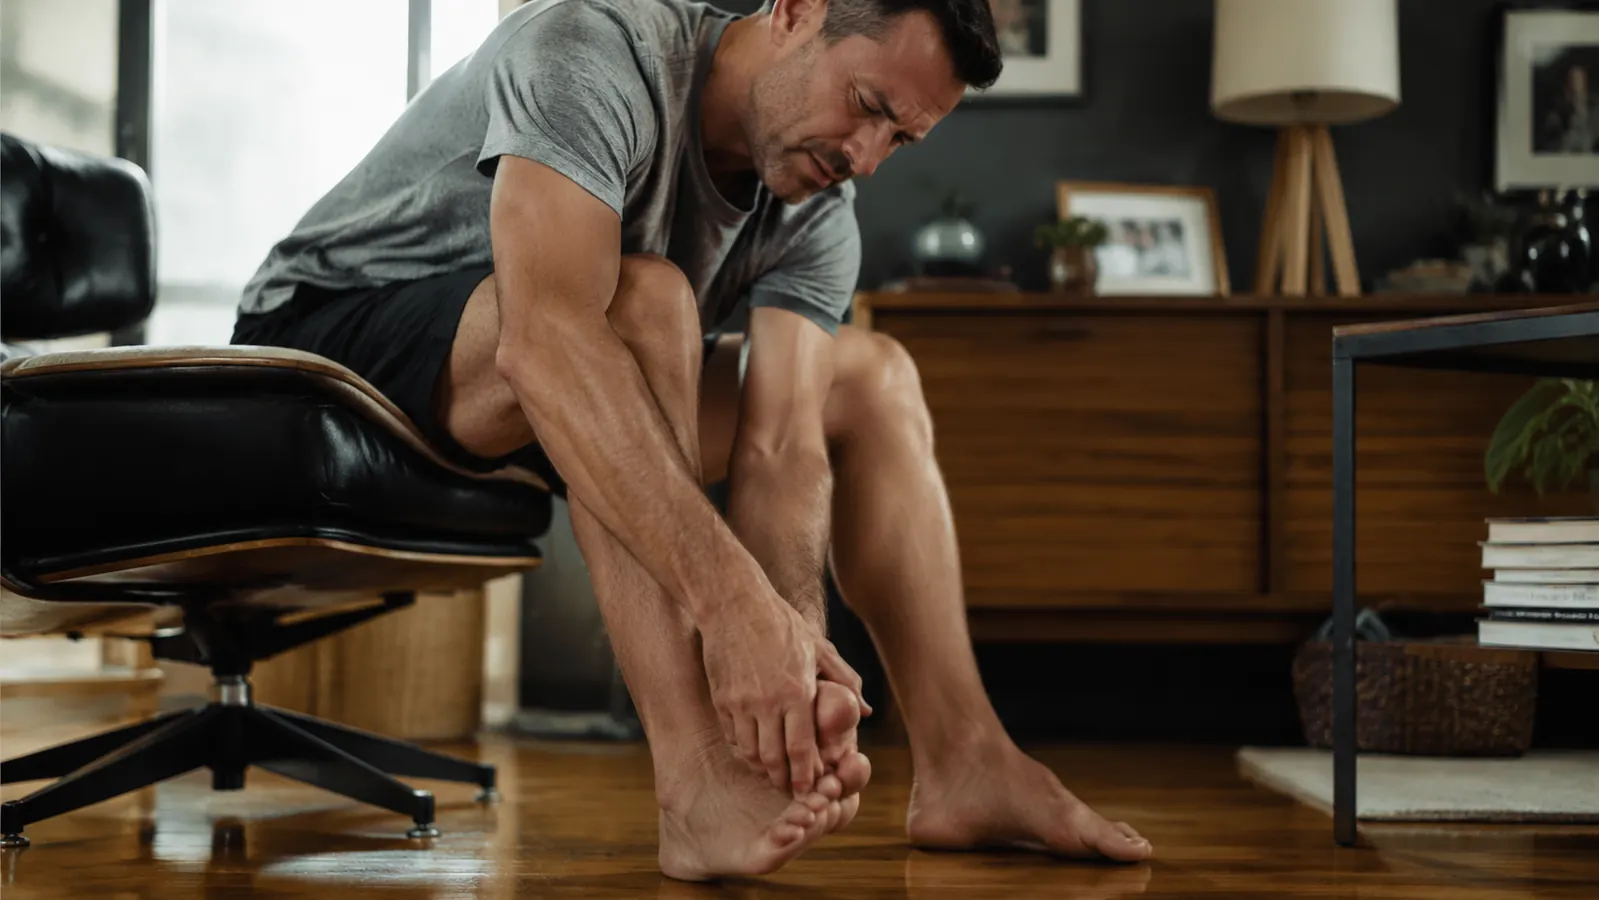
My right heel started hurting on a Thursday morning last October. By Saturday, stepping out of bed felt like pressing my foot onto a carpet tack. I had plantar fasciitis. I knew what it was because I had seen it take out two training partners in the past, and I knew the standard advice: rest, ice, stretching, maybe a cortisone shot if it gets bad enough. What I did not know was that a lacrosse ball and a specific 10-minute rolling protocol would be the thing that actually moved the needle, faster than anything else I tried.
I spent about three weeks doing generic foot stretches with mediocre results before a physical therapist I trust told me to stop treating the heel and start treating the tissue upstream. The plantar fascia runs from your heel to the base of your toes. When it is chronically tight, the attachment point at the heel gets hammered every time you take a step. Rolling the fascia itself, not just stretching it, helps break down adhesions and restore normal tissue mobility. That is what the lacrosse ball is for. But there is a right way to do it and a wrong way, and the wrong way kept me limping longer than I should have.
Your heel should not be deciding your training schedule.
The Kieba Lacrosse Massage Balls are firm enough to actually break through fascial adhesions without deflating after a week of use. Set of two, rated 4.7 stars by over 24,000 reviewers. These are what I use for both foot rolling and hip work.
Amazon Check Today's Price on Amazon →What You Need Before You Start
You need one firm ball. Not a tennis ball, not a racquetball, not a soft stress ball. Those are too soft and compress under your body weight, which means they spread load over too wide an area to create useful mechanical pressure on the fascia. A standard lacrosse ball is the right density. The Kieba set gives you two, which means you can tape them together for a peanut-ball variation later if you want to address the calves, but for plantar fasciitis work you are using one ball at a time.
You also need a chair or a wall. The seated position and the standing position create different amounts of pressure, and you will use both, starting with seated. A yoga mat or a rug under you is optional but keeps the ball from skidding on hard floors. That is your full equipment list.
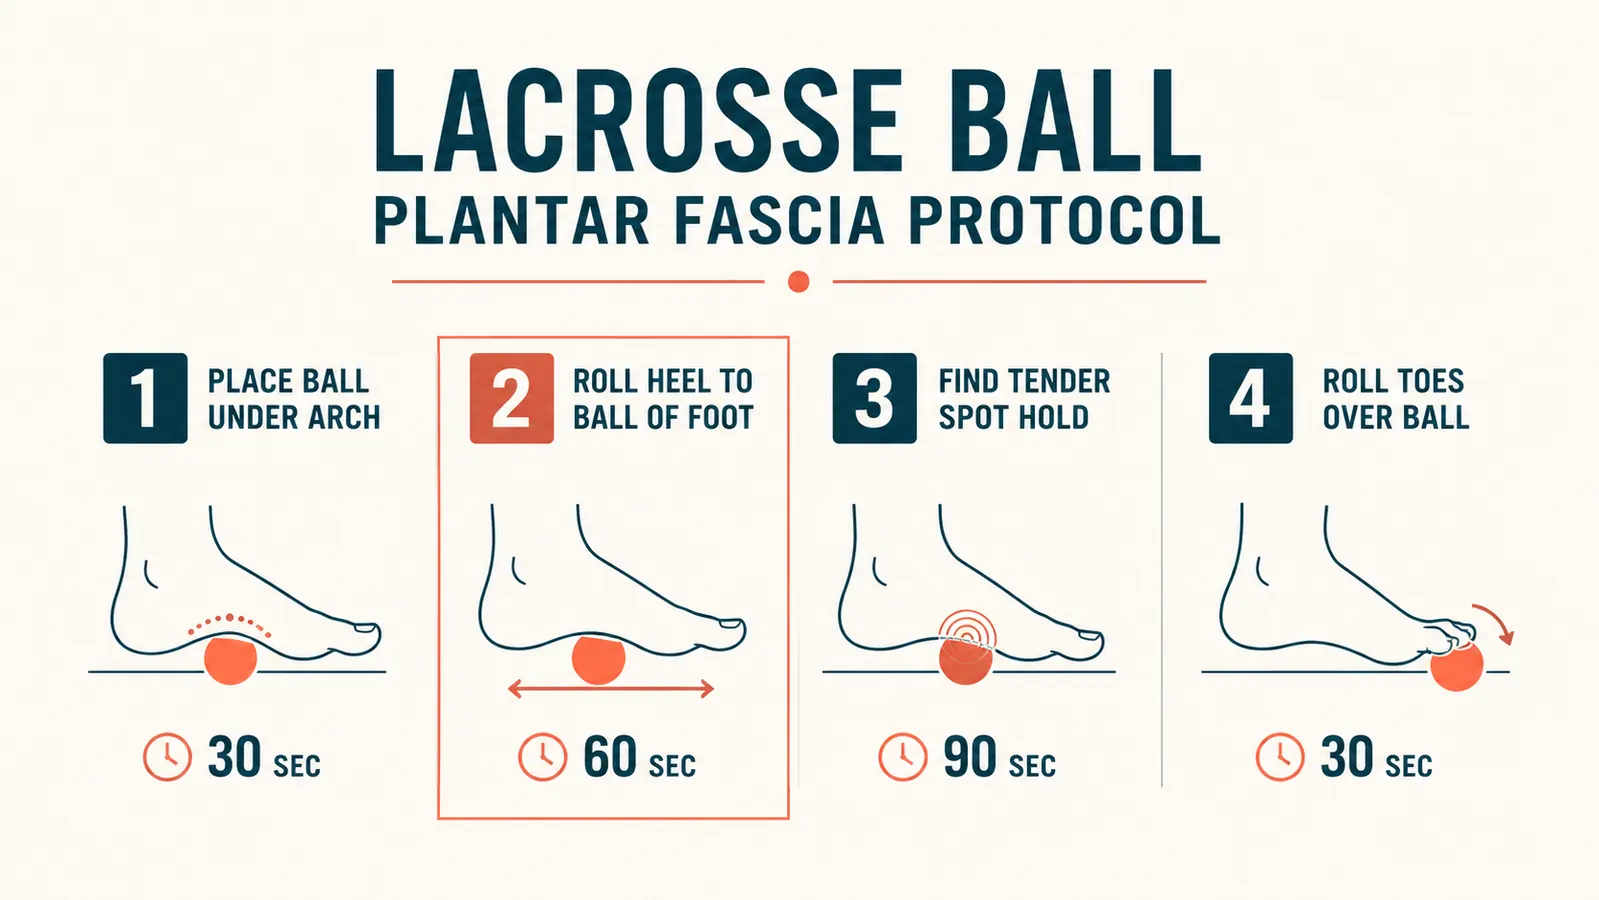
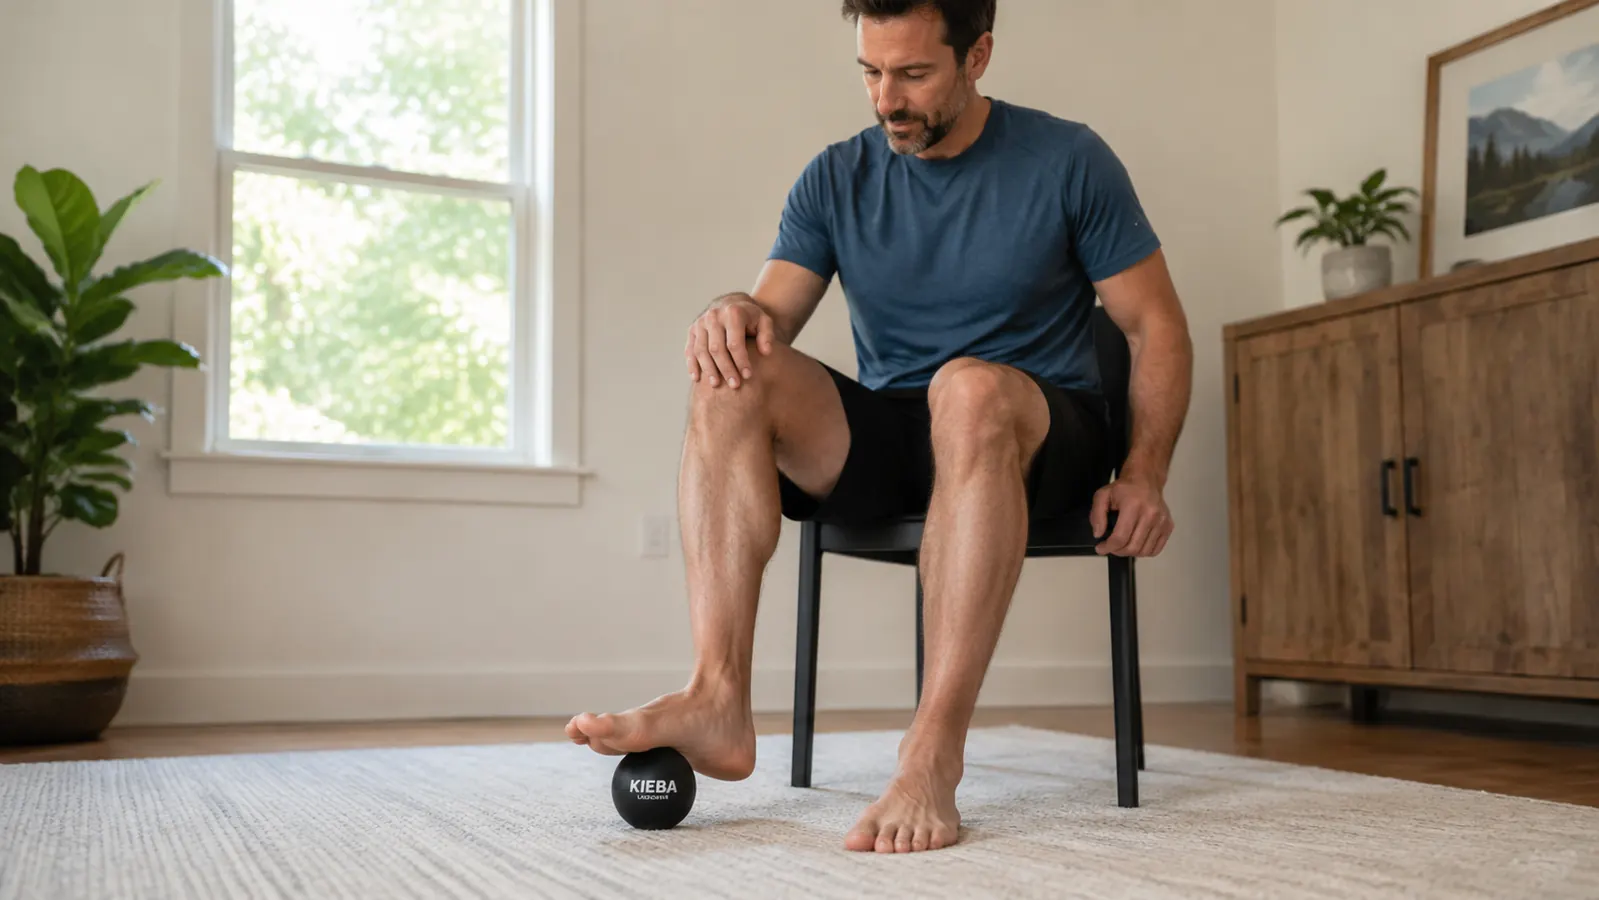
Step 1: Start Seated, Find Your Three Zones
Sit in a chair with both feet flat on the floor. Place the lacrosse ball under the affected foot. The sole of your foot has three functional zones you will work through in sequence: the heel pad just forward of the very back of the heel, the arch through the middle of the foot, and the ball of the foot near the base of your toes. Most people with plantar fasciitis feel the worst pain at the heel attachment, but rolling only the heel is a mistake. You need to work the whole fascial band.
Start at the arch, not the heel. Position the ball under the highest point of your arch and let your foot rest on it with maybe 30 to 40 percent of your body weight. You should feel a firm, dull pressure. If you feel sharp or shooting pain, lift your foot and reduce the load. Breathe normally. Stay in this position for 30 seconds without moving the ball.
Then do short, slow forward-and-back rolls along the length of the arch, about an inch of travel in each direction. Go at a pace of roughly one full roll every two seconds. You are not trying to cover ground fast. Slow and deliberate lets the tissue respond. Do this for 60 seconds in the arch zone.
Step 2: Move to the Heel Zone With Care
Slide the ball back toward the heel. Stop about half an inch forward of the very back of your heel bone. You do not want to roll directly on the bone itself or on the bony protrusion at the very back. The target is the soft tissue just in front of that. If you have a spur, avoid direct pressure on it entirely and stay in the soft tissue area. Apply the same 30 to 40 percent body weight you used in the arch.
In the heel zone, use small circular motions rather than a straight roll. Slow clockwise circles, about two inches in diameter, for 30 to 45 seconds. Then switch to counterclockwise for another 30 seconds. The circular pattern addresses the fascial fibers that run in multiple directions at the heel attachment, which is where most of the damage accumulates in plantar fasciitis.
This zone will probably be the most tender. That is normal. A 4 to 6 out of 10 on soreness is acceptable. A 7 or above means you are applying too much pressure or moving too fast. Back off the weight and slow down. You should feel like you are working something, not punishing it.
Step 3: Work the Ball of the Foot
Slide the ball forward to the metatarsal area, the wide part of your foot behind your toes. A lot of people skip this zone because plantar fasciitis pain is usually concentrated at the heel, but the fascia runs all the way forward and tightness at the front end pulls on the attachment at the back. This is why pure heel treatment often fails.
In the ball-of-foot zone, apply a little less pressure than you used at the arch. The tissue here is more sensitive and there are more small bones close to the surface. Short lateral rolls, side to side, for about 45 seconds. You may feel pops or clicks under the tissue. That is normal. If there is any sharp pain in this area rather than dull pressure, stop and see a clinician, because metatarsal stress reactions can mimic plantar fasciitis symptoms and should not be rolled.
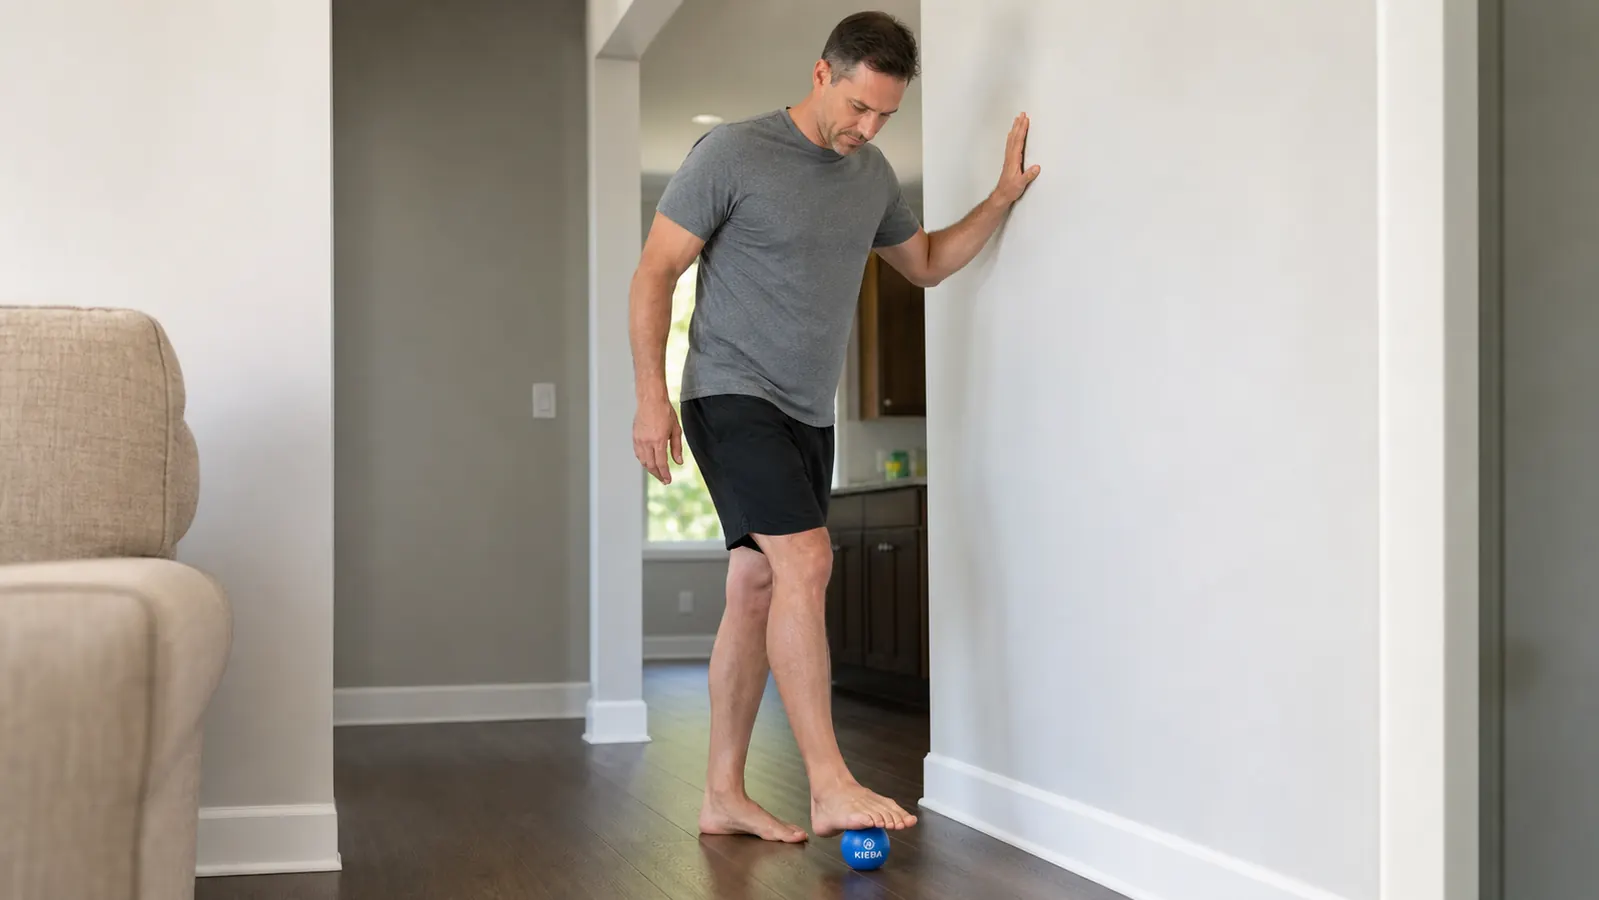
Step 4: Add Standing Pressure for Deeper Release
Once you have completed the three-zone seated sequence, stand up. Place the ball on the floor and put your affected foot on it with one hand on a wall or doorframe for balance. Now you are using your full body weight as the loading mechanism. For most people this will be significantly more pressure than the seated version, roughly 70 to 100 percent of your body weight funneled through a 2.5-inch ball.
Start with a very slow walk in place on the ball, shifting your weight forward and back over the arch zone. Take five seconds to roll from heel to ball of foot and five seconds to roll back. Do this for 60 to 90 seconds total. If the pressure feels overwhelming, shift more weight onto the wall-hand and the standing foot. You are in control of how much load you apply.
Do not bounce. Do not rush. The most common mistake in standing rolling is moving too fast, which turns this from a therapeutic technique into just balancing awkwardly on a ball. Slow is the whole point. The sustained pressure is what creates the mechanical change in the tissue.
Step 5: Finish With a Toe-Stretch Hold
After the standing roll, do one final seated position. Place the ball at the arch, curl your toes back toward your shin as far as they go comfortably, and hold that position for 30 seconds while maintaining light pressure on the ball. This loads the fascia in a lengthened position while the ball is still in contact with the tissue. It is the one part of this routine that bridges myofascial release with the stretching that physical therapists have been recommending for years. They work better together than they do separately.
Release the toe extension, lift your foot off the ball, and stand up slowly. Walk around for 30 seconds before you put a shoe on. The first few steps after rolling will likely feel odd, sometimes more tender, sometimes noticeably better, sometimes both. That is normal tissue response. It usually normalizes within a few minutes of walking.
The first two weeks I rolled too hard and too fast. I thought more pressure meant faster results. It does not. Slow, deliberate work at a 4 to 5 out of 10 soreness level moved the needle. Grinding away at 8 out of 10 just left the foot angrier the next morning.
Duration and Frequency: How Often Should You Do This
The full protocol, all three zones seated plus the standing sequence plus the final stretch hold, takes about 10 to 12 minutes per foot. Do the affected foot every day, ideally twice a day during the first two weeks. Morning is the most important session because that is when the fascia is at its tightest after hours of non-weight-bearing sleep. The first steps of the day are often the worst for plantar fasciitis patients, and rolling before you put your foot down can reduce that morning pain significantly.
If you only have time for one session, make it the morning one, done before you stand up and take your first steps. Keep the ball on your nightstand. Sit on the edge of the bed, roll for 10 minutes, then stand. That single change made a bigger difference for me than anything I tried in the first three weeks.
As symptoms improve, you can taper to once a day, then every other day as maintenance. For prevention during heavy training blocks, two sessions a week is enough to keep the tissue from tightening back up. I have been doing two maintenance sessions a week for four months now and have not had a recurrence.
What Else Helps
The lacrosse ball addresses the fascia directly, but plantar fasciitis is usually driven by a combination of factors: tight calves that load the fascia excessively, weak intrinsic foot muscles that do not absorb impact properly, and training volume that outruns your recovery. The ball is not a complete fix on its own. Pairing it with calf stretching (especially the soleus, the deeper calf muscle, which responds to bent-knee stretching) accelerates recovery. Towel scrunches and single-leg calf raises on a step build the foot strength that prevents recurrence.
Footwear matters too. Running in worn-out shoes with collapsed arch support is one of the most common triggers. If your shoe midsole is compressed and has lost its rebound, it is not protecting the fascia the way it should. This is not a selling point for expensive shoes. A $60 pair of fresh trail runners with adequate cushion does more than a $200 pair that has 600 miles on them.
Night splints are worth considering if morning pain is severe. They hold the foot in a dorsiflexed position through the night so the fascia does not shorten during sleep. They are not comfortable and most people abandon them. But for the first two weeks of a bad flare-up, they can reduce that brutal first-step pain that makes mornings miserable.
What to Avoid
Do not roll directly on the very back of the heel bone. That is the calcaneus, and grinding a firm ball directly into bone does nothing useful and can aggravate bursitis that sometimes accompanies plantar fasciitis. Stay in the soft tissue, half an inch to an inch forward of the bone.
Do not roll through sharp or shooting pain. Dull ache and a sense of pressure working into the tissue is productive. Sharp pain, numbness, or tingling into the toes means something else is going on, possibly a nerve impingement or a stress fracture, and rolling will not help either of those. Stop and see someone.
Do not use a frozen water bottle instead of a lacrosse ball. I see this suggested constantly. The cold does reduce inflammation temporarily, but the softness of a plastic bottle means you are not creating enough localized pressure to actually work the fascia. If you want cold therapy, use it separately after the rolling session, not as a substitute for it.
Do not skip the unaffected foot entirely. If one side has plantar fasciitis, the other side is likely carrying extra load while you compensate. Rolling both feet, spending a little less time on the healthy one, keeps compensation patterns from creating a second problem while the primary one heals.
Ten minutes a day with the right ball gets you back to training faster than guessing.
The Kieba Lacrosse Massage Balls are the ones I have been using for this protocol and for general trigger point work. Firm, durable, and priced so you do not feel bad leaving one in your gym bag and one on your nightstand. Over 24,000 ratings averaging 4.7 stars.
Amazon Check Today's Price on Amazon →